+ PID Temperature Controller Teardown
Last weekend, I went to the Guangzhou markets with my buddy Matt. There was lots of good stuff there, but one of the things that caught my eye were these PID temperature controller modules. Its the sort of industrial process control gear that is normally inaccessible to mortals. Fortunately for me, this was China, so I plunked down 80yuan and took one home with me.
+ Exterior
The unit is an elongated cube with interface on one side and terminals on the other. Its got a schematic silkscreened on one side to make hooking it up possible without a reference manual. Pretty snazzy.
+ Interior
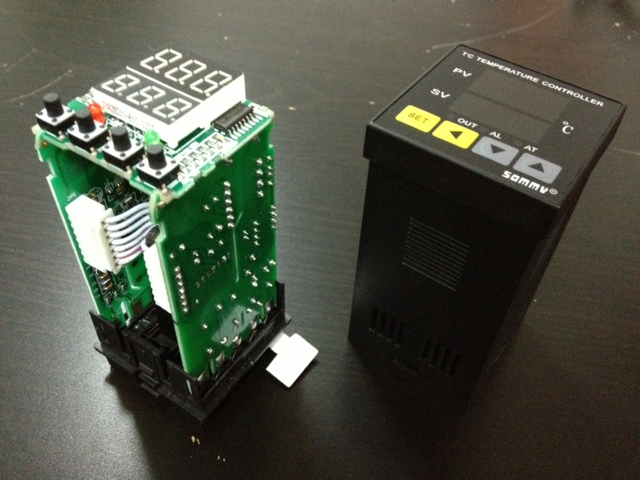
Getting inside was pretty easy. The thing has tabs that you press and all the guts slide right out.
The first thing I noticed was that the interior is pretty much all PCB. There are 3 PCBs + the terminal block that are all soldered together for electrical and mechanical strength.
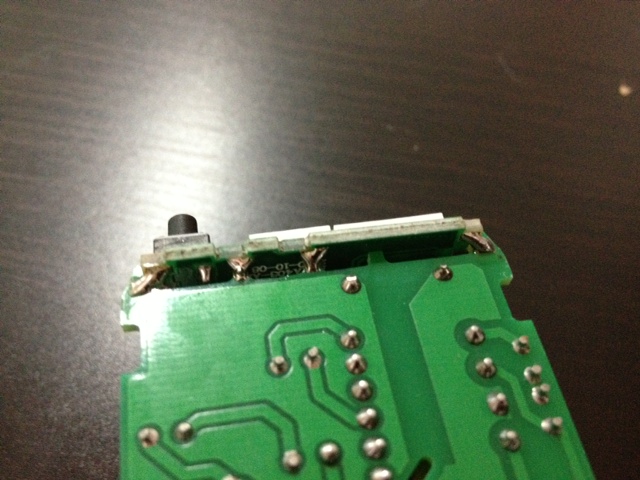
Elsewhere there 2 PCBs connecting. They designed pads onto each PCB where they needed to connect. Then someone simply bridged the pads with solder. Very clever. Not the strongest connection in the world, but it is certainly cheap and effective.
The interface board is interesting. Nothing too fancy here. A couple buttons, some LEDs, and some 7-segment displays. Nice and simple.
The board appears to be controlled by an Atmega and they kindly left the ICSP header exposed and labeled. Probably for their manufacturing process, but if I wanted to hack this device I could load my own firmware too.
+ Wiring it up
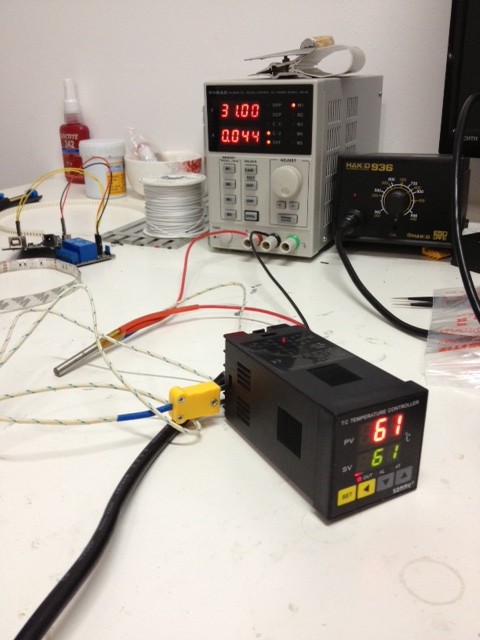
The controller is powered with AC wall current (110-230v) so I hacked up a power cable to control it. I took a thermocouple and a heater cartridge and taped them together with Kapton. I wired up my desktop bench supply to provide current to the heater.
Unfortunately my PID settings were way off and this thing has too many options that I didn’t want to mess with. After a couple minutes though it settled in an the appropriate temperature.


Recent Comments